

Well, I did warn you that OSP won’t always take the most obvious route – especially when photography and tech start cross-processing each other. And yes, this is one of those moments. Let’s kick things off with a little context. I may not be in my twenties anymore (my inner nerd strongly disagrees, by the way), but if you’ve grown up on a steady diet of sci-fi – from Alien to Wall-E – and you happen to be a bit of a tech-head, then chances are: your boyhood dreams of talking computers and intelligent machines are knocking at your digital doorstep.
And so… enter the HUD. Obviously. A slick little add-on for your screen that gives you a cockpit-style overview of your system. It shows you, at a glance, how your machine’s doing – temperatures, CPU loads, RAM usage, fan speeds, network stats – whatever you like. A digital dashboard for the modern-day tinkerer. And honestly? If that doesn’t make your inner Tony Stark grin, I don’t know what will.
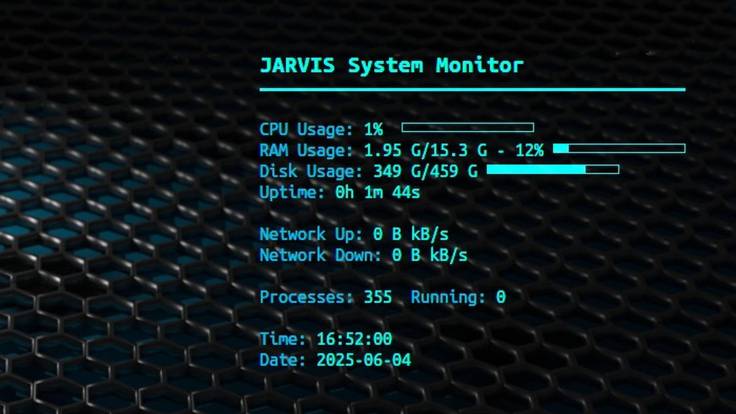
And “JARVIS”? well, I think that’s obvious.
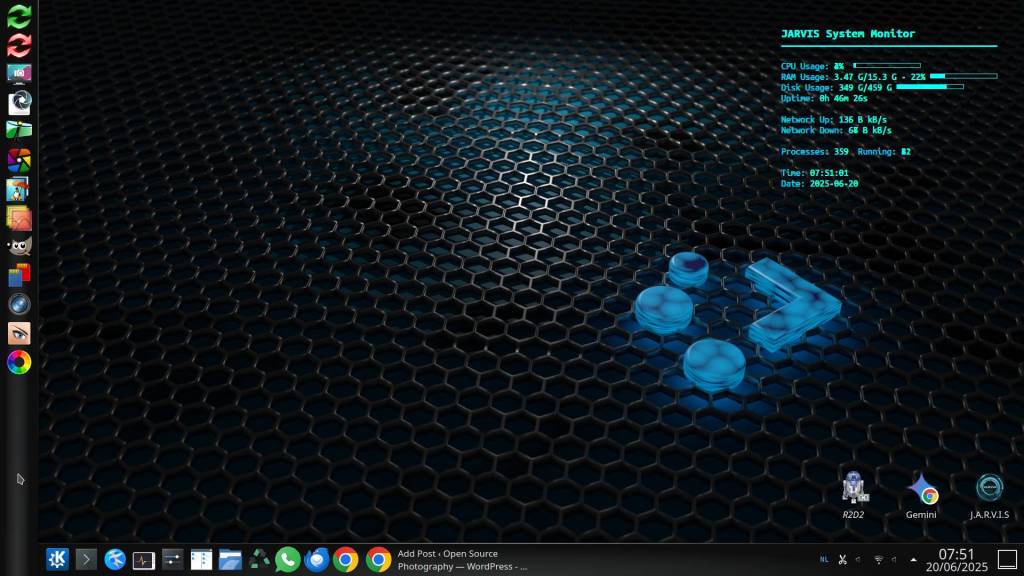
Oh, and that tiny R2D2 icon sitting in the corner of my screen—right there, beside Gemini and ChatGPT Plus? That’s my personal AI. Local, offline, and stuffed with knowledge. Not as fast as ChatGPT, but smarter than most junior sysadmins and reference librarians put together. And the best part? No internet required. He’s like an obedient little genius that lives on my machine.
But here’s the important bit: this is not for the faint-hearted. If your idea of troubleshooting is “turning it off and on again,” you might want to sit this one out. You’ll need to be comfortable with the terminal, editing config files, and not flinching when things break just enough to be interesting.
Still with me? Great. This HUD is for you.
If not… no shame. Go rewatch Wall-E. He understands.
You get two versions:
- HUD beneath your windows — neat in the background, unobtrusive
- HUD on top of everything — for those who want the HUD to truly overlay
Both with clear install steps, config, and startup instructions.
What You Need
- Linux (Kubuntu, Ubuntu, Debian, Fedora, Arch, etc.)
- Conky, the ultimate lightweight system monitor
- Terminal (Konsole, GNOME Terminal, etc.)
- Text editor (nano, vim, kate…)
Step 1 – Install Conky
Ubuntu/Kubuntu/Debian:
sudo apt update
sudo apt install conky-all
Fedora:
sudo dnf install conky
Arch:
sudo pacman -S conky
Step 2 – Create Your Config File
nano ~/.conkyrc
If you’re more comfortable in a plain text editor, just create the file in nano or any terminal-based editor, then copy-paste and tweak the code in Kate – or whatever floats your editing boat.
Step 3 – HUD Configuration
Changeable Title Variable
At the top of the script you’ll find:
local hud_title = ‘JARVIS System Monitor’
Change it to any name you like, e.g. 'Marc’s Dashboard' – 'System Info' or ‘Mary’s Kitchen Status’ 🙂
3a – HUD beneath windows (current OSP setup)
local hud_title = ‘JARVIS System Monitor’
conky.config = {
alignment = ‘top_right’,
gap_x = 40,
gap_y = 40,
minimum_width = 300,
minimum_height = 200,
own_window = true,
own_window_type = ‘desktop’,
own_window_transparent = true,
own_window_argb_visual = true,
own_window_argb_value = 0,
double_buffer = true,
cpu_avg_samples = 2,
net_avg_samples = 2,
override_utf8_locale = true,
use_xft = true,
font = ‘Ubuntu Mono:size=11’,
uppercase = false,
default_color = ‘#00FFFC’,
color1 = ‘#00BFFF’,
border_width = 1,
border_inner_margin = 3,
draw_borders = false,
draw_outline = false,
draw_shades = false,
stippled_borders = 0,
update_interval = 1.0,
short_units = true,
};
conky.text = [[
${font Ubuntu Mono:bold:size=14}${color #00FFF7}]] .. hud_title .. [[${font}
${hr 2}
${color1}CPU Usage:${color} ${cpu}% ${cpubar 6,100}
${color1}RAM Usage:${color} $mem/$memmax – ${memperc}% ${membar 6,100}
${color1}Disk Usage:${color} ${fs_used /}/${fs_size /} ${fs_bar 6,100 /}
${color1}Uptime:${color} $uptime
${color1}Network Up:${color} ${upspeed wlp0s20f3} kB/s
${color1}Network Down:${color} ${downspeed wlp0s20f3} kB/s
${color1}Processes:${color} $processes ${color1}Running:${color} $running_processes
${color1}Time:${color} ${time %H:%M:%S}
${color1}Date:${color} ${time %Y-%m-%d}
]];
Replace wlp0s20f3 with your actual network interface (use ip a to find it).
3b – HUD above all windows (overlay mode)
local hud_title = ‘JARVIS System Monitor’
conky.config = {
alignment = ‘top_right’,
gap_x = 40,
gap_y = 40,
minimum_width = 300,
minimum_height = 200,
own_window = true,
own_window_type = ‘override’,
own_window_transparent = true,
own_window_argb_visual = true,
own_window_argb_value = 150,
double_buffer = true,
cpu_avg_samples = 2,
net_avg_samples = 2,
override_utf8_locale = true,
use_xft = true,
font = ‘Ubuntu Mono:size=11’,
uppercase = false,
default_color = ‘#00FFFC’,
color1 = ‘#00BFFF’,
border_width = 1,
border_inner_margin = 3,
draw_borders = false,
draw_outline = false,
draw_shades = false,
stippled_borders = 0,
update_interval = 1.0,
short_units = true,
};
conky.text = [[
${font Ubuntu Mono:bold:size=14}${color #00FFF7}]] .. hud_title .. [[${font}
${hr 2}
${color1}CPU Usage:${color} ${cpu}% ${cpubar 6,100}
${color1}RAM Usage:${color} $mem/$memmax – ${memperc}% ${membar 6,100}
${color1}Disk Usage:${color} ${fs_used /}/${fs_size /} ${fs_bar 6,100 /}
${color1}Uptime:${color} $uptime
${color1}Network Up:${color} ${upspeed wlp0s20f3} kB/s
${color1}Network Down:${color} ${downspeed wlp0s20f3} kB/s
${color1}Processes:${color} $processes ${color1}Running:${color} $running_processes
${color1}Time:${color} ${time %H:%M:%S}
${color1}Date:${color} ${time %Y-%m-%d}
]];
Step 4 – Start the HUD
conky -c ~/.conkyrc
Stop Conky:
killall conky
Quick restart:
killall conky && conky -c ~/.conkyrc &
Step 5 – Start Conky Automatically
- Open System Settings → Startup and Shutdown → Autostart
- Add a new application:
conky
Final Tips
- Ensure your compositor is running for transparency (on by default in KDE)
- You can easily adjust fonts, colors, position, and more
- Works across all major Linux distros with X11
Now you can build your own system monitor HUD, JARVIS-style. Whether subtle and clean, or boldly on top — you’re in control.
Discover more from Open Source Photography
Subscribe to get the latest posts sent to your email.


That is just… Amazing 🙌🙌🙌
You never cease to amaze me.
Have a great weekend Marc 🙏
LikeLiked by 1 person
Thanks so much, Mark!
You know, now that I can finally write the way my head actually works – raw, real, and unfiltered – I’ve been able to shake off the limitations of basic translation tools. With stuff like Google Translate, you always end up dumbing things down, writing safe and flat just to avoid it tripping over your words.
But now? I get to say things the way I mean them.
Really appreciate all your support and encouragement.
Wishing you and your family an awesome weekend!
Marc.
LikeLiked by 1 person