

5 minutes read time
If you remember the last article, ‘Chasing the Aurora: Overlay Experiments with Northern Lights’, you’ll recall that while the results were more or less okay, there were definitely some flaws—mainly with the overlay technique itself. I first came across this method years ago from Trey Ratcliff, who used it—probably in Adobe—to blend colours and textures from one image into another. You can see examples of this technique here: https://marcroovers.wordpress.com/2022/11/22/red-planet/ and https://marcroovers.wordpress.com/2022/11/23/aurora/.
The downside? It blends everywhere, so you end up with transparency in all sorts of places where you’d rather not have it.
There are a few ways to fix this—some better than others. One common approach is to use masks and ‘paint’ in the parts of the image you want to keep or remove. But with something detailed like a tree, that gets fiddly fast.
That’s why the next method is a real time-saver—especially for images with a clear horizon and sky. The trick? The ‘Color to Alpha’ tool. You’ll find it in GIMP under Layers → Transparency → Color to Alpha. It’s a quick and effective way to get good results with this kind of overlay. By the way, all editing here is done in Gimp 2.10.25.
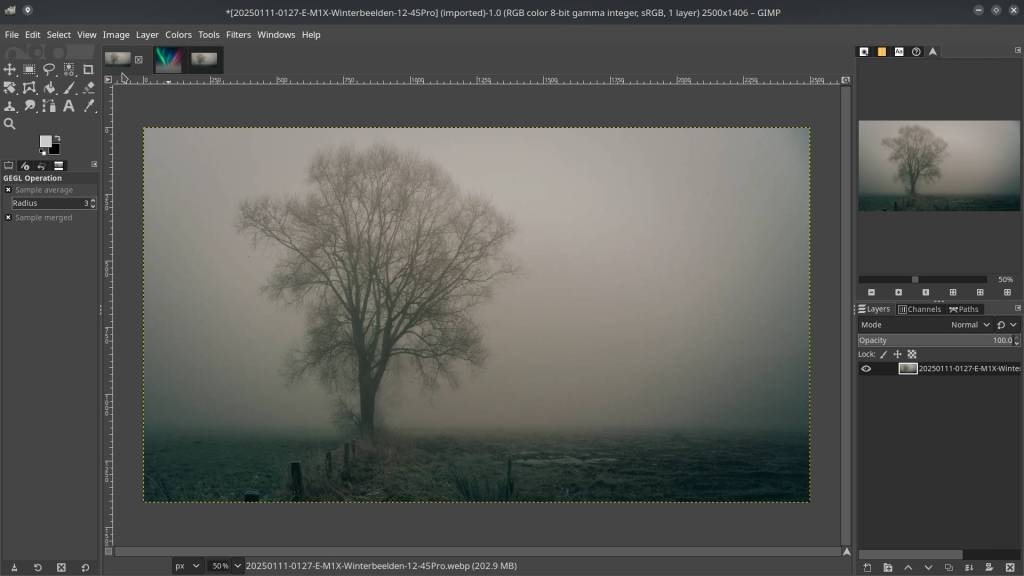
Open your base photo:
Open the aurora image separately – resize if necessary :
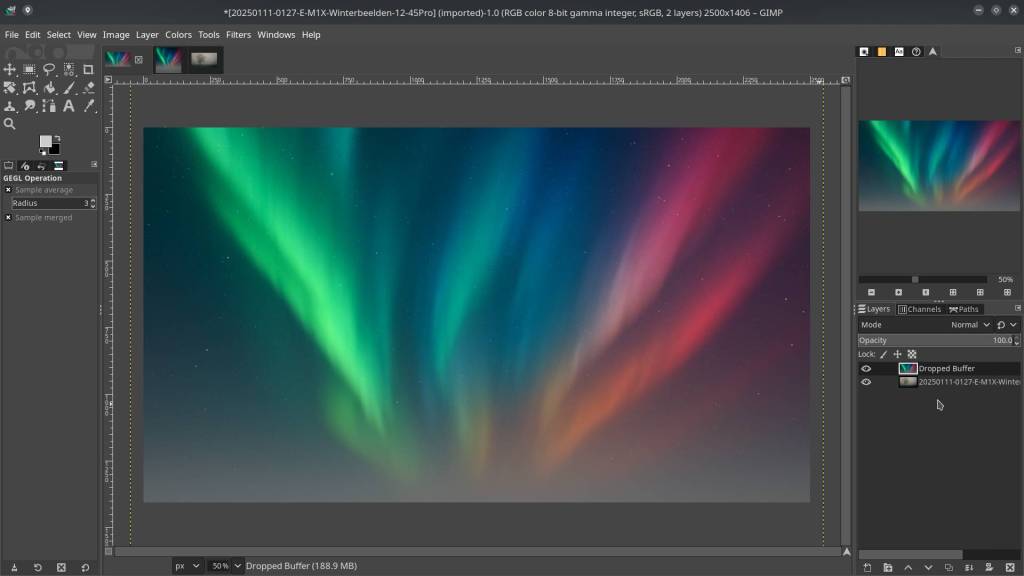
Click the aurora tab and drag it into the tab of the base image. Hover over the image and release — this adds the aurora as a new layer on top.
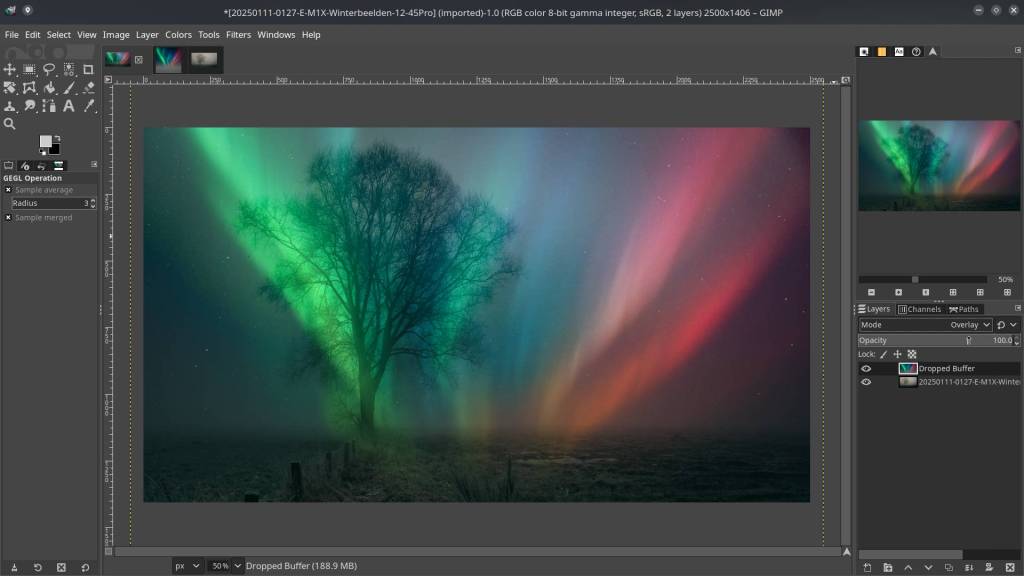
In the Layers panel, select the aurora layer and set its mode to “Overlay” or “Screen”.
Adjust opacity to taste:
Open the base photo again, click and hold, move it over the layerd combination, drag to window and let go – it adds the base as a top layer :

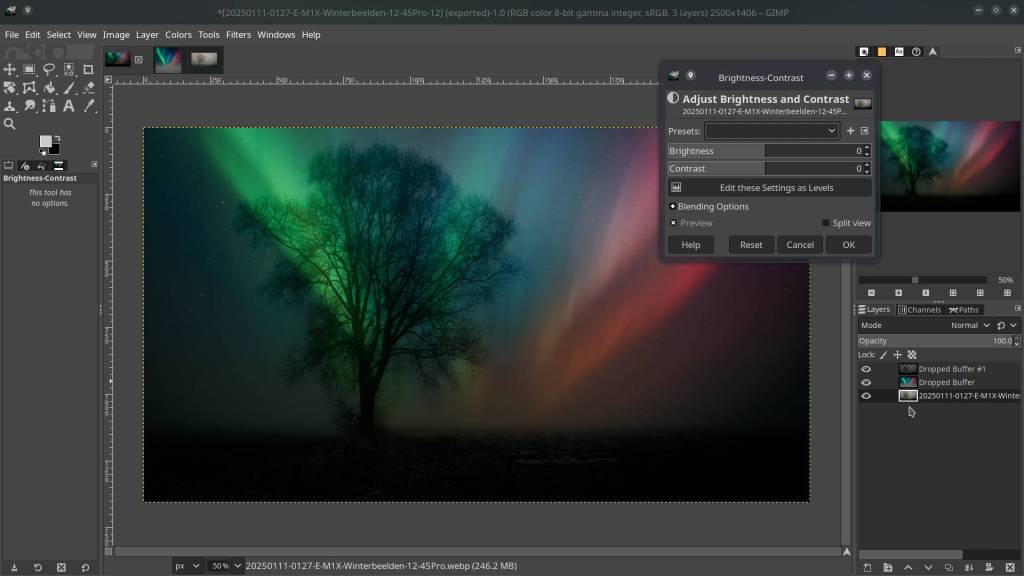
Right-click on a part of the sky, move down the pop-up menu and go to Layer → Transparency → Color to Alpha. You may need to tweak the transparency or opacity threshold for best results.
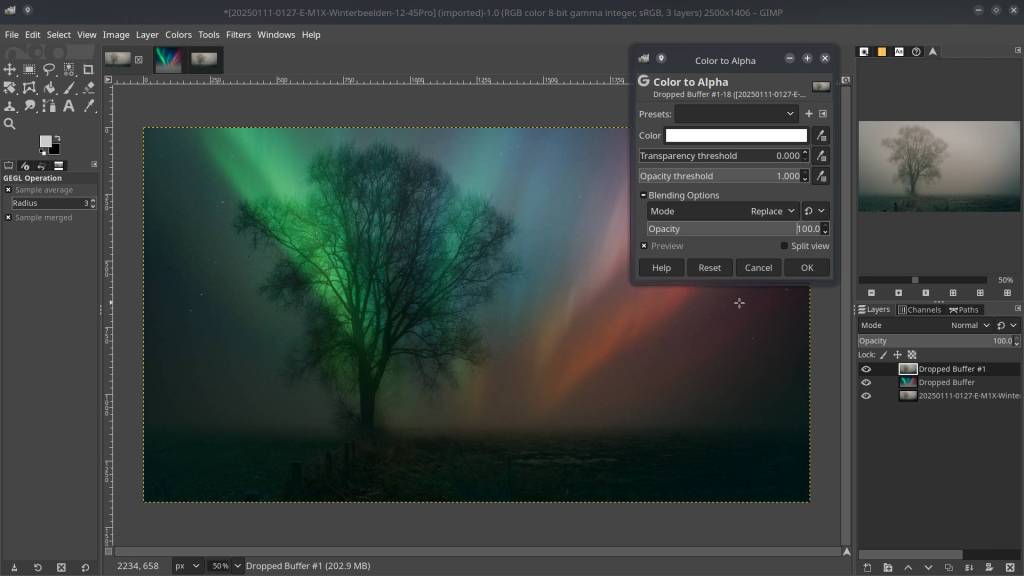
Adjust exposure/contrast to taste :
This will give you a much better result than those earlier “experiments.”
Examples:


By fine-tuning the base photo in advance (exposure, contrast, blacks), you can push the final result even further—but honestly, I’m quite happy with this experiment as it is. The header photo is a variation on the layers workflow described above, and the third photo I published yesterday on my gallery.
More Methods to Taming the Aurora Overlay – OSP Quick Guide :
“Darken Only” might do the trick now and then, but if you want real control (and fewer psychedelic trees), here are other ways:
- Layer Mask Magic
Put your subject (e.g., that stubborn tree) on top, right-click and add a layer mask. Paint white where you want the subject solid, black where the aurora gets to shine through. Or—be lazy—use a selection to do the hard work. No more guesswork with blend modes. - Alpha Channel Wizardry
Give your subject a proper alpha channel. Select it using “Select by Color” or the Fuzzy tool. Now erase or mask the aurora wherever it shouldn’t sneak in. The aurora never trespasses on your precious branches again. - Blend Modes: If You Insist
“Screen” is usually the least offensive, letting the lights in but not overcooking things. “Addition” or “Lighten Only” can work too. But let’s be honest: masks nearly always beat blend modes when it comes to detail. - Hybrid Tricks
Nothing stops you from mixing a blend mode with a mask. Example: aurora set to “Screen” and a mask to keep your subject clean. Best of both worlds. - Automatic Selection Hacks
If you’ve got a silhouette, try “Color to Alpha” on your tree layer. Instantly generates a transparent cutout—sandwich ready, minimal effort, maximum effect.
Result: more control, less accidental “aurora hair” on your subjects, and you still get to look clever in front of your audience.
Fast Masking for Fiddly Trees (No Monk Work Required)
Hand-painting every twig? Life’s too short. Try these smarter, faster ways to mask your forest:
- Select by Color / Fuzzy Select Tool
Select your tree layer and grab the “Select by Color” tool (that little wand—usually Shift+O). Click a dark part of your tree and tweak the Threshold until the whole tree joins the party. Happy with the selection?
Right-click the layer → Add Layer Mask → “Selection.”
Boom: an instant, detail-hugging mask. Even the smallest branches are covered. - Quick Mask Trickery
Hit Q for Quick Mask mode. With a big brush, quickly paint over the tree—no need for Michelangelo-level precision. Fine-tune with selection tools or use “grow/shrink” for quick fixes. Hit Q again to turn off Quick Mask, then make a mask from your selection. Done!
No more tedious painting—just quick, clever masking. Perfect for busy bushcrafters, woodland photographers, and anyone with better things to do!
Happy layering !
Marc.
Bonus : Free Layers
The layers I used in this experiment are available for download at opensourcephotography.itch.io:

This article was written by Marc R.
While I primarily speak Dutch and have some knowledge of English and a little French, ChatGPT helps ensure my writing is grammatically correct. I often mix Dutch and English in my drafts, and ChatGPT steps in to translate and correct.
I don’t have any Sponsoring Companies, Patreon support, or Follower Donations.
I don’t drink Coffee, well, I do … but not the financial form you sometimes find on other websites, like ‘buy me a coffee’ 😊
However, what I truly need to keep going is Motivation, and the best part is, it won’t cost you a thing. You can offer it for free – just hit the Like button and Subscribe !
Discover more from Open Source Photography
Subscribe to get the latest posts sent to your email.

